Support
Activation
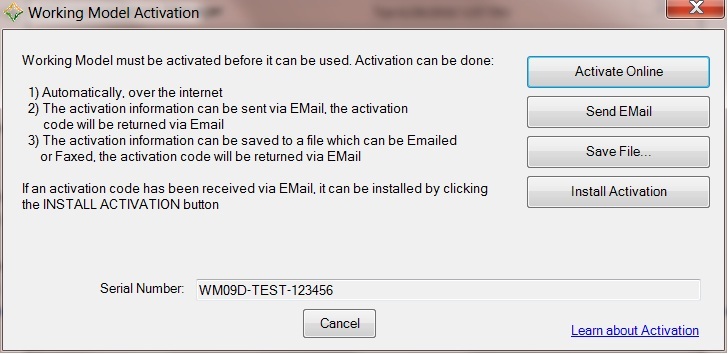
When you start your DST product for the first time after installation, the Activation Window will be displayed:

This window provides three methods to activate your product:
- Activate Online - Click this button and a connection to the DST corporate license generator will be established. Your serial number and information about your computer will be transmitted to DST and a license code will be returned and automatically installed. After successful completion, the product will start. This is the easiest method available to activate your product and install its license. However you need an active connection to the internet in order to be able to use this process.
- Send Email – Clicking this button will connect with your Email client, create an Email message, attach the required information about your product and server and send it to DST. You may have to approve the creation of the Email message, depending on how your Email client is configured. DST will return the license code to you in an Email with the license file as an attachment. The Email will contain instructions on how to install the code, but briefly you need to save the Email file attachment, display the above Activation Window, and the click Install Activation. You will be prompted to select the file you just saved and the license code will be read from that file and installed. After successful installation, the product will start.
- Save File – Clicking this button will prompt for the name of a file into which the server information will be written. You can then send an Email to activation@design-simulation.com and attach the file to the Email message. DST will return the license code to you in an Email with the license file as an attachment. The Email will contain instructions on how to install the code, but briefly you need to save the Email file attachment, display the above Activation Window, and the click Install Activation. You will be prompted to select the file you just saved and the license code will be read from that file and installed. After successful installation, the product will start.
Please see our contacts page for information about how to contact us if you have further questions.


